In need of an idea for your child's next birthday party? Why not turn to their bookshelf to get inspiration from their favorite bedtime stories. For my daughter Jayda’s second birthday I decided to create a modern color block party inspired by her favorite book Elmer the Patchwork Elephant. The book is an absolute necessity in your child's collection! It’s an inspiring tale about self image, acceptance and diversity in little kid language.
 |
| Elmer! |
I always like to approach projects by first asking myself, “what materials do I already have at home?” Maybe it’s because my inspirational moments happen at odd hours when the stores are closed, or maybe I truly am trying to reduce, reuse, and recycle. Regardless, I needed to find something to use as a base for an Elmer Pinata. A party is not a party without a pinata in our household.
What better than a six pack beer bottle carrier! It made a great body because it could hold candy but was fragile enough to break when hit by a two year old.
I cut the bottom out and replaced it with plain craft paper (any paper will work) I wanted the bottom to be weak enough for the candy to fall through without much force.

Then I tied a string to the top handle
I used paper towel rolls for the trunk and legs. The legs were easy, just cut and tape. The trunk needed to curve a bit and gradually narrow. I started with a medium sized piece of tube cut at an angle.
Then the next piece of tube was cut short and then cut lengthwise and re-taped to make it a bit skinnier. I then stuck the skinnier tube into the first tube and taped it into place.
To finish off the trunk, I cut one more short tube lengthwise and taped it so it fit the previous tube. Voila! a trunk!
Next came Elmer's ears, they were easy enough to make out of the same craft paper (grocery bag) that I used to cover the bottom. I just creased them across the center before taping them to the body so they looked flappy. (yes, I used a word that's not really a word)
To close elmers body at the top, I cut two more over sized rectangles of craft paper and taped them to the roof of elmers body. I left the second half open so I could insert the candy into the top.
Time to add the patchwork to Elmer!
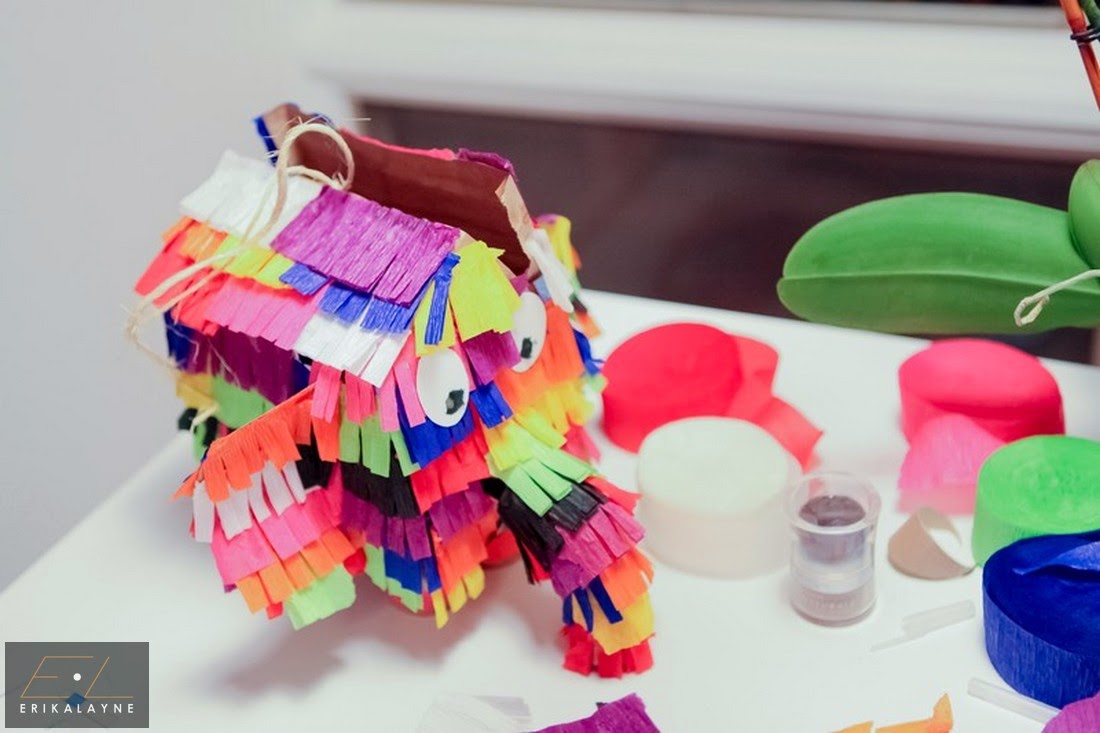
I used streamers because they came in the colors I needed and they were at the dollar store. You might also be able to paint it with acrylic or tempera paint, or cut square construction paper and glue them to his body. I wanted to keep the pinata flair so I used the streamer paper.
I prepared each color by making long strips first, then cutting them into shorter chunks. I created a double layer by glueing two strips of streamer together on one side.
I cut slits into the unglued edge of the streamer. Then cut them into chunks.
I started gluing chunks of varying colors working from the bottom row and gradually layering until I reached the top.
I cut eyes out of construction paper and glued them above the trunk.
We filled him with organic lollipops from Trader Joe’s, and taped him up!