Instagram SnapWidget

Showing posts with label diy. Show all posts

The coolest Valentine's ideas ever

Monday, February 10, 2014

We have come up with some wholesome and extremely dorky ideas for your children to bring to school this Valentine's Day. We promise you they will be equipped with the coolest and corniest tokens of love and friendship for miles around. We know the little munchkins love their candy, but these are some tried and true tricks to keep them entertained, in positive spirits, promote creative play and have fresh breath. And these ideas won't hurt your wallet because they were all purchased at the handy dandy dollar store...BAM!


6 for $1, you can't beat that with a stick!


most of these items are stuck onto cards with removable glue dots

3 for $1...WHAT, and this is the most expensive one on our list.


enough for almost the whole class for $1 :-o

WHOLE bag for ...you guessed it!
I cut an "X" in the middle and stuck the balloon through the opening.

otherwise known as silly putty!

I wrapped these in plastic wrap before attaching them with two glue dots.


Our valentine's gift to you is to give you all the PDF's for the printouts used in this post. Please email us (sugarlayneblog@ gmail.com) with the subject "Valentines" and we will send you the link ;)
JJ just wanted to play with all of the above
 photo signature_erika_zps6b73882f.png

Tissue Roll Craft Ideas

Wednesday, December 18, 2013

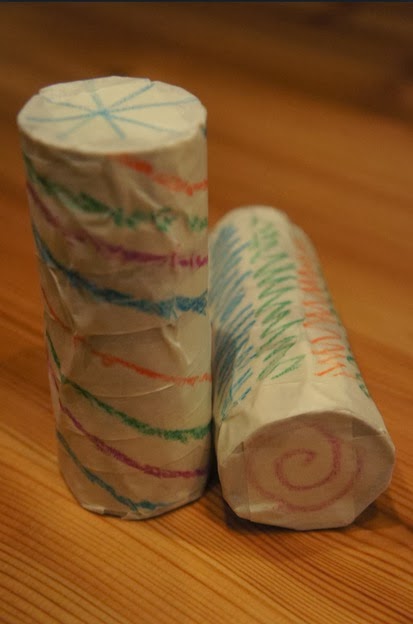
If you can pull your kids away from these rainbow loom bracelets long enough to even remotely consider another form of entertainment....save up some tissue rolls!

I am about to have my girls do their own self-portraits and I want to explore some creative projects with them to get their juices flowing. This is one we will do over the Holiday break; because they will NOT be watching TV! (Unless I need to distract them for a certain amount of time---I'm not perfect.)


I find it downright gotdamn evil that someone is this talented, and my kids are not there yet, but these are ridic!

OK. NO thanks, but cute little maracas.....maybe with cotton balls inside?
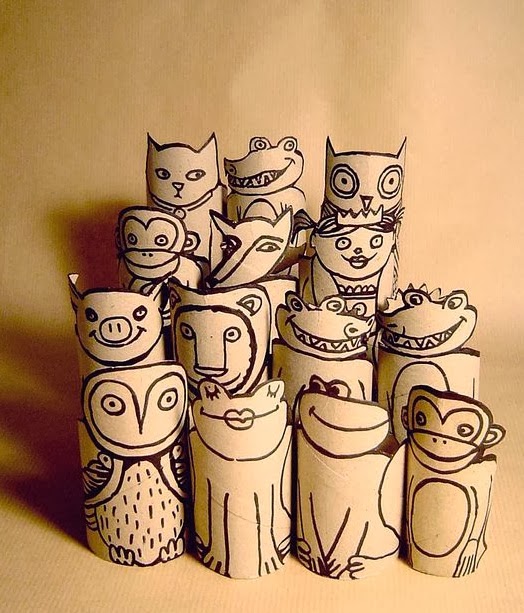
LOVE this idea! My kids love animals, and these are ADORBS. 

Ooh we can wet them and shape faces to make creepy puppets!  

How about some bathroom wall art? I would make bubbles 

We can print some fabric and make curtains for their windows?


Photo Creds:

1  /  2  /  3  /  4  /  5  /  6


 photo signature_erika_zps6b73882f.png

Tutorial: Rustic Winter Centerpiece

Monday, November 25, 2013


Hello! :) It is that time of year! Eggnog, Pine Trees (or plastic wanna-bees like mine) --- and Holiday Decor!! Recently Erika and I made our way down to the local wholesaler from whom I purchase some of my wedding/ event decor needs. It was freezing in the cooler, but who cares when you are picking out some flowers?!

This arrangement is a sample for one of the corporate holiday parties that I am designing, but it can really be used to spruce up your boring dinner table this holiday season---not assuming it's boring but if you're anything like me there is a fruit bowl and some crumbs for everyday ambiance.

Anyhoo. Anyone who knows me is aware that I am completely self taught, so floral arranging is really just an art to me; I like things to be very organic and loose, but you can play around with your form. You may find that you hate arranging flowers, or completely love it! The hardest part; knowing how much of what to buy!

Here is what I brought:
Spray Roses, White Roses, Hydrangea

Dusty Miller, Brunia, Kochia (Silver) 

Some type of damn berries, Wheat, Dried Pomegranates, Dried Lotus Pods


These Bark containers fit the rustic theme I was going for, and the floral foam, once very wet, will hold the flowers in place exactly where I want them and allow me to use less flowers. 
If you have time, it makes sense to unwrap everything, and snip all of the ends, and put all of your flowers in fresh cool water--- (warm water for roses if you want them to open up fast like an easy date. hehe)

As much as I love Hydrangea, they have to be in water 100% of the time, or they will wither fast. I do not usually put them in floral foam because they die fast this way, so if you use them, skip the foam!


I start with my fillers around the edges, then build it through the center, and go back to add more fillers. OR, whatever you plan to take up the most space with, start there. 


If you can see past my chipped nails (hey I am an artiste!) --- you will see that I am massaging my Dusty Miller into a better shape, these little hairy leaves feel so good! 


No foam necessary for these little vases; they are small enough to hold the shape of the flowers for me! :) 


Bam. 

A little baby one!


This is my little Jayda-Bear!!! 
 photo signature_erika_zps6b73882f.png

Elmer Birthday Party

Friday, November 8, 2013

In need of an idea for your child's next birthday party? Why not turn to their bookshelf to get inspiration from their favorite bedtime stories. For Jayda’s second birthday I decided to create a modern color-block party inspired by her favorite book Elmer the Patchwork Elephant. The book is an absolute necessity in your child's collection! It’s an inspiring tale about self image, acceptance and diversity in little kid language.

Elmer!
Some people may call me stingy, simply because I think of any and every way to save money, yet still do all the aesthetically pleasing home and craft projects my little heart desires. I think of myself as pretty generous, specially when it comes to giving my time and talents. That is one trait I'd like my kids to adopt. So when it came to planning this party, I HAD to hit up my two favorite stores, the dollar store (the real dollar store! NOT the one that claims to be the dollar store, yet everything they sell costs more than a dollar), and the thrift store.
My first move was to make a pinata, because no party is really a party without a pinata in our Afro Cuban household. Find out how to make him out of a six pack of beer, the full tutorial is here!


While browsing through the dollar store I happen to see these medium sized color blocked paper pails which became the party favors when stuffed with dollar store goodies.


I used an inexpensive grey bed sheet (thrift store find) as a table cloth. The toddlers participated in a painting project during the party so I wanted to use something I didn’t care about. I try to stay away from the disposable plastic tablecloths whenever possible (that is a topic for another day.)


I purchased small green square plates from the party store. (it would have been cute to use mismatched plates, I just didn’t have enough guests to buy multiple packs) Notice the repetition of the square shape.


I enjoy planting and painting with my daughter and I wanted to incorporate an exciting and useful art project that was inexpensive. I bought small clay pots and trays from Micheal’s and permanent acrylic paints. I chose permanent because if the guests wanted to use them outside, they wouldn’t have to coat the pot to seal the paint. If I did it over again, I would have used washable paint, just in case little fingers touch their little cute clothes. I also gave each guest two flower bombs (purchased on Etsy) to plant in their pot and each guest had their own paint brush.


(note: Parent involvement is a MUST when attempting to paint with toddlers.)


They could also paint a small wooden elephant if they were inspired by the story. As a final treat, they all sat down around me for story time.

I absolutely love confetti! I found paper confetti at the dollar store, yippy!


Square garland made from string and card-stock colored paper and hung from the chandelier.


Gray balloons with colored strings brought that elephant skin color into the decor. Plus, balloons are tons of fun for a two year old!


Every craftsy mom wants to be able to say that they made everything from scratch at their child's birthday parties. Let’s face it, that isn’t always the case. We happened to find this orange ombre cake at the supermarket, and this orange ombre dress at Target! Sometimes keeping your sanity means letting some things go unmade (but not uncoordinated.)


Lastly, I made a photo backdrop out of foam-board and small water balloons filled with air (warning: Use a pump for these little guys, or your cheeks will start to burn after the second one). I taped the balloons to the foam board. My only downfall was that it wasn’t big enough, definitely bigger is better in this case.


We hope you are inspired to turn your child's favorite book into their next party and don’t forget to share your creations and ideas with us!
 
  photo signature_erika_zps6b73882f.png

Blog Design by Nudge Media Design | Powered by Blogger

Hover Pin It Code

<